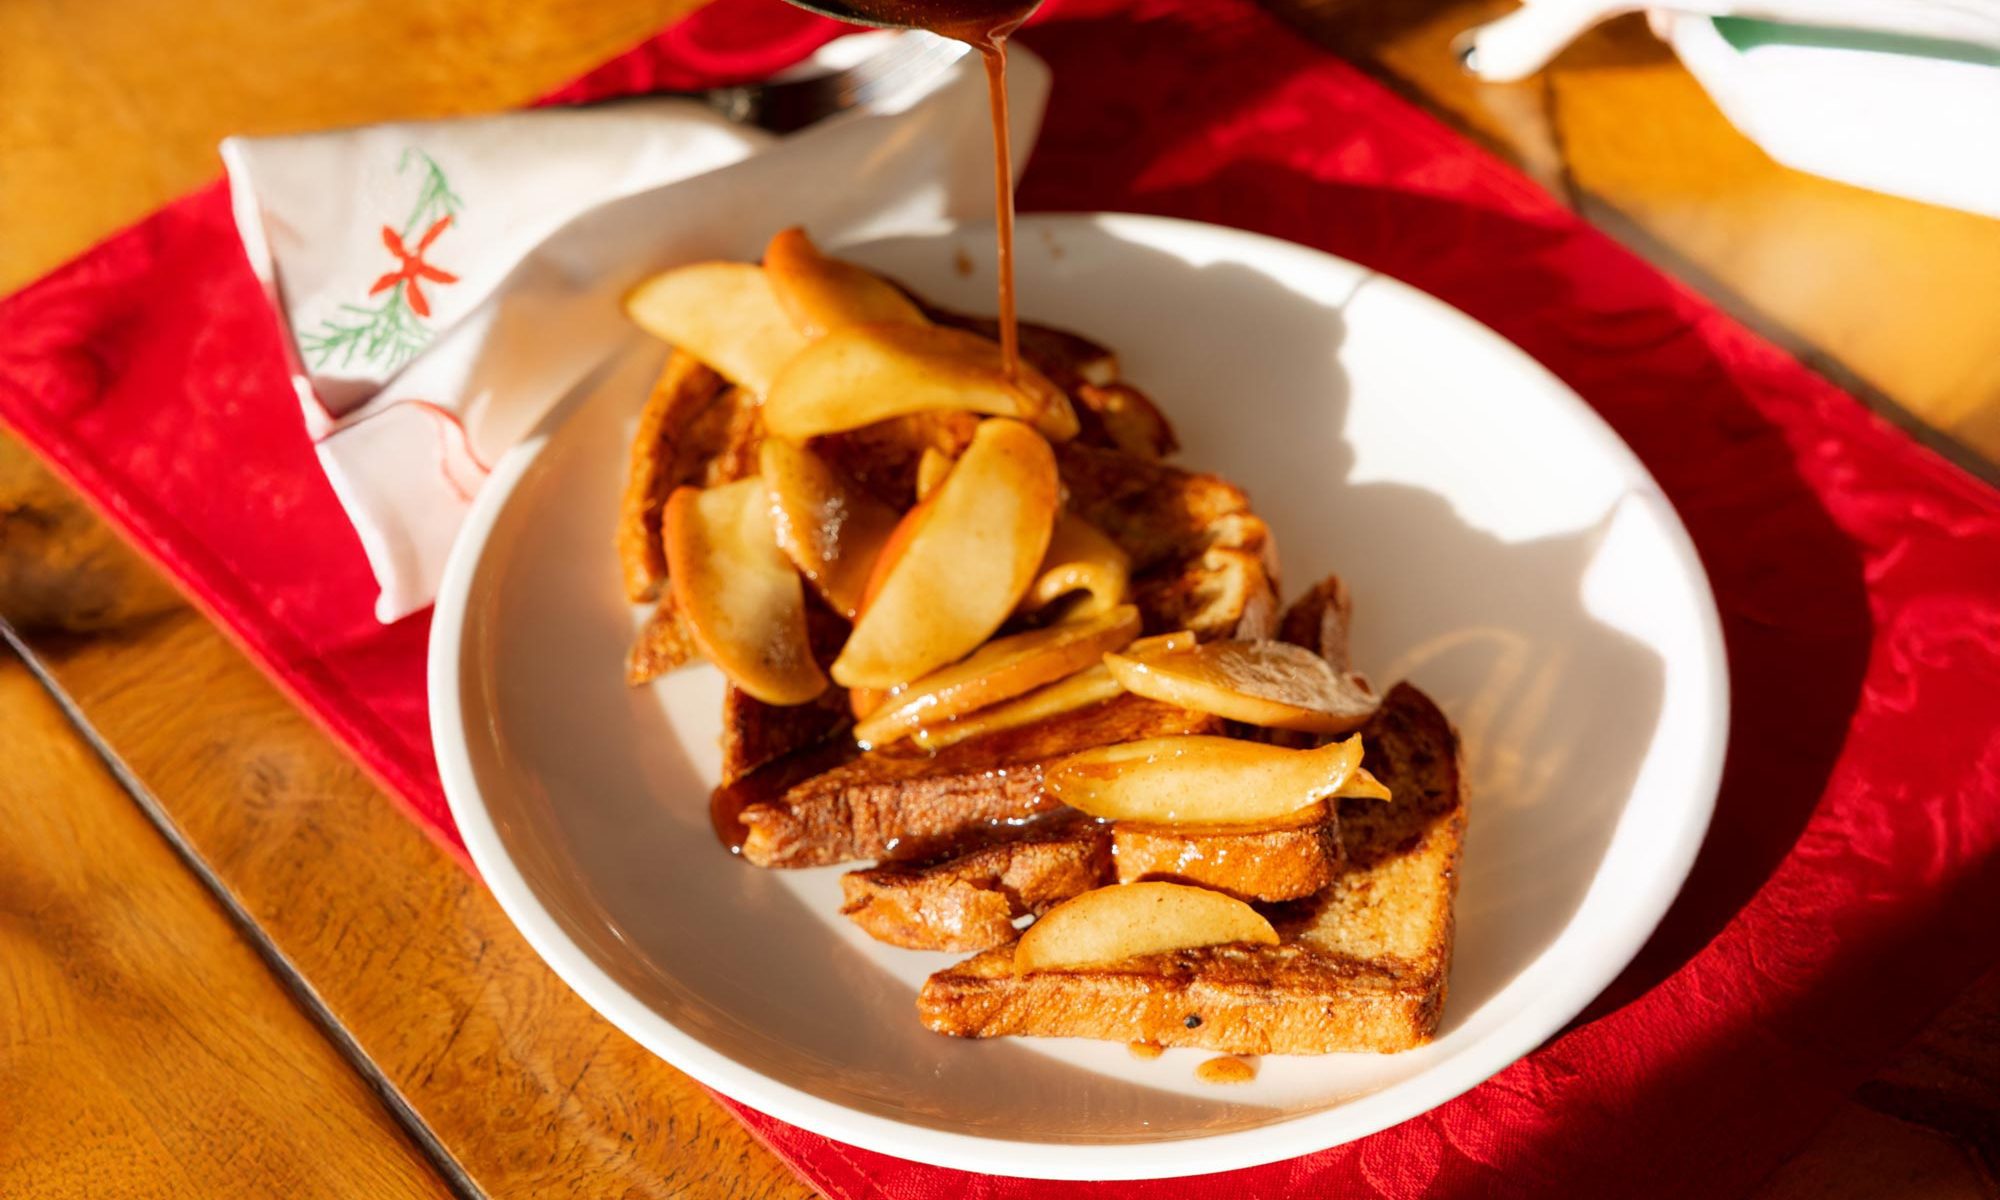
Skip to content

Robert St. John

Restaurateur, author, enthusiastic traveler, & world-class eater.

Apple French Toast

French toast has been a favorite since childhood—probably one of the first things I could make on my own. Pancakes were my grandmother Muz’s domain, but French toast was all mine. King’s Hawaiian Bread is always a solid choice, but if you can find a bakery that makes fresh brioche or sweet sourdough, grab it. Never been shy about my love for apples, especially Honey Crisp and Fuji. Apple pie’s always been my go-to, but this recipe takes the best part of apple pie and turns it into breakfast.

Ingredients

Apple Topping
3 each Honey Crisp or Fuji apples, core removed and cut into 1/4-inch slices
4 tablespoons unsalted butter
½ cup apple brandy
1 cup light brown sugar, packed
¼ cup honey
2 teaspoons ground cinnamon
½ teaspoon ground nutmeg
½ teaspoon kosher salt

For the French Toast
1 cup whole milk
6 large eggs
¼ cup granulated sugar
2 teaspoons ground cinnamon
¼ teaspoon ground nutmeg
1 ½ teaspoons pure vanilla extract
Pinch salt
6 to 8 tablespoons unsalted butter, melted
12 slices King’s Hawaiian Bread

Instructions

Preheat oven to 175° F

For the topping, in a 12-14-inch skillet, melt four tablespoons butter over medium-high heat. Stir in the apples and sauté for four to five minutes, stirring occasionally to prevent sticking. Add the apple brandy (stand back a bit as the brandy will create flames).

Simmer until the flames burn off then stir in the brown sugar and honey. Continue cooking for eight to ten minutes, until a thick syrup forms. Stir in the cinnamon, nutmeg, and salt. Hold the topping warm in the oven while you prepare the French toast.

In a medium-sized mixing bowl, whisk together the milk, eggs, sugar, cinnamon, nutmeg, vanilla extract, and salt. Place a large non-stick skillet over medium heat (If using an electric griddle, set the temperature to 350° F). Brush the surface with the melted butter.

Cook in batches that will fit evenly in the skillet. Dip the bread in the batter for 15 seconds and place it in the hot skillet. Cook for three to five minutes, or until the surface is golden brown. Flip the bread over and continue cooking for four to five more minutes. Hold the French toast on a cooling rack, over a baking sheet in the warm oven while you finish cooking the remainder of the French toast.

To serve, cut the French toast in half on a diagonal. Place four to six slices on each serving dish and spoon the apple topping over the top.

Serves 4 to 6

Recent Recipes

Potato Gratin

Potatoes are the one vegetable I could never give up. Fried, roasted, mashed, or scalloped—doesn’t matter, they’re always on the table in one form or another. This gratin is my favorite way to make them feel a little more special. It’s rich, creamy, and just decadent enough to make it feel like you’re putting in some extra effort. There’s a good bit of cheese in this recipe, but that’s exactly how it should be. The combination of sharp white Cheddar, gruyere, and Parmesan gives it the perfect balance of nuttiness, creaminess, and tang. And using Yukon gold potatoes instead of russets makes a big difference. They have just the right amount of starch to get creamy without getting mushy. This dish is a showstopper on the holiday table, but I’d eat it on a random Tuesday without hesitation.

Read more

Orange Cranberry Muffins

These muffins are like Christmas morning in a bite—bright, citrusy orange paired with tart, bursting cranberries. The combination feels like something you'd find in a festive basket dropped off by a thoughtful neighbor. Perfect for Christmas gift giving or to have on hand for guests throughout the holiday.

Read more

Chocolate Christmas Cheesecake

Chef Linda Roderick has been by my side through these cookbooks for over two decades, and there’s no one I’d rather have guiding me through a cheesecake recipe. She’s a master of the craft—steady, exacting, and always aiming for perfection. This rich, decadent chocolate cheesecake is no exception. It's all about balance. The deep, smooth chocolate filling meets a crisp, slightly salty crust for a perfect bite every time. Ensure your cream cheese is at room temperature before mixing—otherwise, you’ll end up with lumps. And when you melt the chocolate, give it time to cool slightly before mixing it into the batter, so you don’t end up with curdled filling. It’s worth the patience, every time. A few techniques can elevate this recipe to another level: chilling the dough overnight for a richer flavor, using a water bath to ensure an ultra-smooth texture, and letting the cheesecake rest for at least 24 hours before serving for the best flavor.

Read more