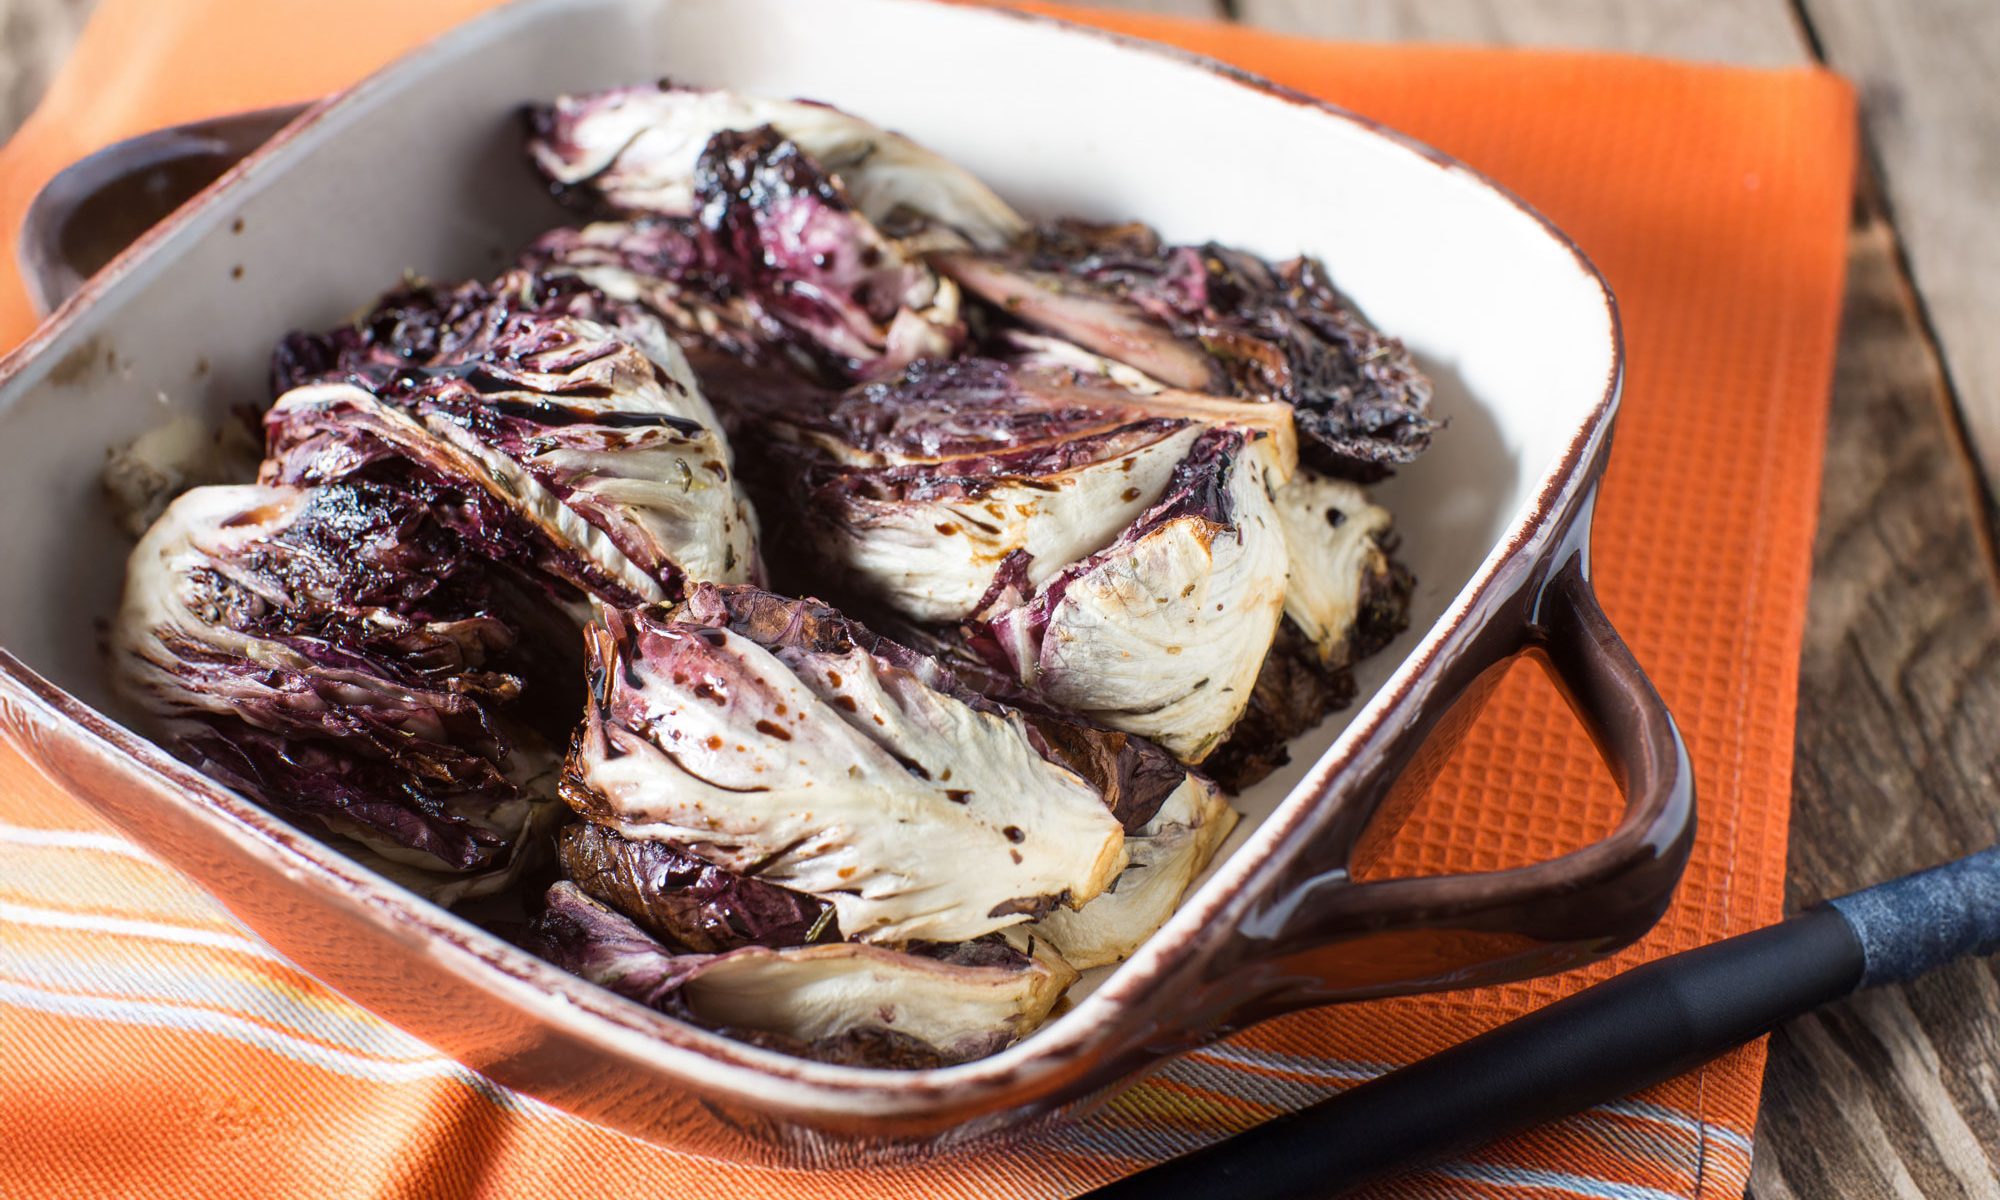
Skip to content

Robert St. John

Restaurateur, author, enthusiastic traveler, & world-class eater.

Grilled Radicchio

Grilling radicchio might sound a little unexpected, but that’s where the magic happens. This hearty Italian chicory goes from bitter to beautifully smoky with just a kiss of flame, picking up those charred edges that make you sit up and pay attention. A drizzle of good olive oil, maybe a splash of balsamic, and suddenly you’ve got a side dish that feels both rustic and elegant. It’s the kind of recipe that reminds you simple ingredients, treated right, can carry the whole meal.

Ingredients

2 heads Radicchio, cut into 4 wedges each
1/4 cup No-Stick Grilling Marinade for Vegetables
2 tsp Kosher Salt
1 tsp Black Pepper, freshly ground

1/4 cup Olive Oil
1 Tbsp Balsamic Vinegar
2 Tbsp Orange Juice
1 tsp Creole Mustard
1 tsp Shallot, minced
1 tsp Fresh Thyme, chopped

No-Stick Grilling Marinade for Vegetables

4 Egg Yolks
1 Tbsp Yellow Mustard
1/4 cup Balsamic Vinegar
1 cup Canola Oil
1 cup Light Olive Oil
Warm water as needed
2 Tbsp Lawry’s Season Salt
2 Tbsp Garlic Powder
2 Tbsp Onion Powder
1 Tbsp Lemon Pepper Seasoning
1 Tbsp Celery Salt
1/2 tsp Black Pepper, freshly ground

Instructions

Place a toothpick through the center of each radicchio wedge to prevent the leaves from falling off. Brush radicchio with the marinade and sprinkle with salt and pepper.Prepare the grill. Cook radicchio directly over medium heat for 5-6 minutes, turning once.

Meanwhile, whisk together the olive oil, vinegar, orange juice, mustard, shallot, and fresh thyme.

Remove the radicchio from the grill and drizzle the olive oil mixture over the radicchio. Serve immediately.

Yields: 6-8 servings

No-Stick Grilling Marinade for Vegetables

Place the egg yolks, mustard, and vinegar in a food processor. Blend on medium speed for 1-2 minutes.

Slowly drizzle oils into the mixture, one tablespoon at a time. If the marinade becomes too thick, add 1-2 tablespoons of warm water. Once all of the oil has been incorporated, add seasoned salt, garlic powder, onion powder, lemon pepper, celery salt, and black pepper until incorporated.

Store covered in the refrigerator until needed.

Yield:
2 1/2 cups

Recent Recipes

Potato Gratin

Potatoes are the one vegetable I could never give up. Fried, roasted, mashed, or scalloped—doesn’t matter, they’re always on the table in one form or another. This gratin is my favorite way to make them feel a little more special. It’s rich, creamy, and just decadent enough to make it feel like you’re putting in some extra effort. There’s a good bit of cheese in this recipe, but that’s exactly how it should be. The combination of sharp white Cheddar, gruyere, and Parmesan gives it the perfect balance of nuttiness, creaminess, and tang. And using Yukon gold potatoes instead of russets makes a big difference. They have just the right amount of starch to get creamy without getting mushy. This dish is a showstopper on the holiday table, but I’d eat it on a random Tuesday without hesitation.

Read more

Orange Cranberry Muffins

These muffins are like Christmas morning in a bite—bright, citrusy orange paired with tart, bursting cranberries. The combination feels like something you'd find in a festive basket dropped off by a thoughtful neighbor. Perfect for Christmas gift giving or to have on hand for guests throughout the holiday.

Read more

Chocolate Christmas Cheesecake

Chef Linda Roderick has been by my side through these cookbooks for over two decades, and there’s no one I’d rather have guiding me through a cheesecake recipe. She’s a master of the craft—steady, exacting, and always aiming for perfection. This rich, decadent chocolate cheesecake is no exception. It's all about balance. The deep, smooth chocolate filling meets a crisp, slightly salty crust for a perfect bite every time. Ensure your cream cheese is at room temperature before mixing—otherwise, you’ll end up with lumps. And when you melt the chocolate, give it time to cool slightly before mixing it into the batter, so you don’t end up with curdled filling. It’s worth the patience, every time. A few techniques can elevate this recipe to another level: chilling the dough overnight for a richer flavor, using a water bath to ensure an ultra-smooth texture, and letting the cheesecake rest for at least 24 hours before serving for the best flavor.

Read more