Skip to content

Robert St. John

Restaurateur, author, enthusiastic traveler, & world-class eater.

Grilled Pizza Dough

Ingredients

2 packages Active Dry Yeast

1 tsp Sugar

2 tsp Honey

1 1/2 cups Warm Water

5 1/4 cups All-Purpose Flour

1 Tbl Salt

1/4 cup Olive Oil + Olive Oil for brushing the pizza dough

Instructions

Dissolve yeast, sugar, and honey in warm water.

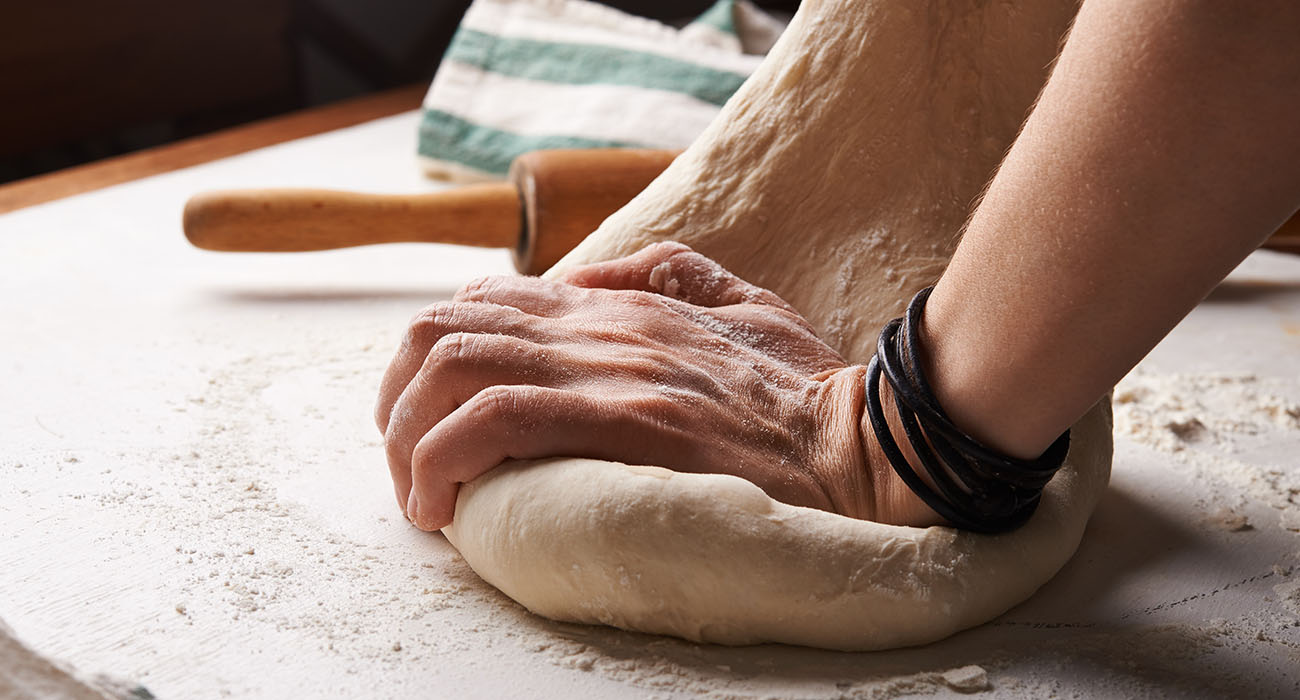
Using a mixer with a dough-hook attachment, place flour and salt in bowl and mix thoroughly. On low speed, slowly drizzle in oil and continue to mix until evenly distributed. Add dissolved yeast. Add remaining cup of water. Once the dough begins to come together, continue kneading it on low speed for 5 minutes.

Transfer the dough onto a floured surface and work by hand 3–4 more minutes. The dough should be smooth, slightly firm, and dry. Place the dough in a large bowl, cover with a damp towel, and place in a warm place to rise for 1/2 hour.

Divide the dough into six 6-ounce sections. On a dry surface, work each individual ball by rotating it in a circular motion, continually tucking the sides down and under. Form dough into a smooth ball with no air pockets. Place dough balls on slightly oiled baking sheet and cover 30 minutes. This can be done 1–2 days in advance (cover dough balls tightly with plastic and keep in refrigerator).

To make the crusts, sprinkle flour or cornmeal on a smooth, clean surface and flatten the to about 2 inches thick. Gently pull the sides, rotating the dough in a circular motion, stretching it to a 7-inch diameter.

Prepare the grill. Lightly brush the dough with oil and cook over direct-medium heat until they are marked on the underside, about 2-3 minutes. Rotate the dough once or twice to prevent burning. Turn dough over and cook 2-3 minutes more. Remove dough from the grill.

At this point you can top the pizzas and finish the cooking in an oven or on the grill over indirect medium heat.

Crusts can be cooled and stored— individually wrapped— in the refrigerator or freezer until needed.

Yield: six 7-inch crusts

Recent Recipes

Potato Gratin

Potatoes are the one vegetable I could never give up. Fried, roasted, mashed, or scalloped—doesn’t matter, they’re always on the table in one form or another. This gratin is my favorite way to make them feel a little more special. It’s rich, creamy, and just decadent enough to make it feel like you’re putting in some extra effort. There’s a good bit of cheese in this recipe, but that’s exactly how it should be. The combination of sharp white Cheddar, gruyere, and Parmesan gives it the perfect balance of nuttiness, creaminess, and tang. And using Yukon gold potatoes instead of russets makes a big difference. They have just the right amount of starch to get creamy without getting mushy. This dish is a showstopper on the holiday table, but I’d eat it on a random Tuesday without hesitation.

Read more

Orange Cranberry Muffins

These muffins are like Christmas morning in a bite—bright, citrusy orange paired with tart, bursting cranberries. The combination feels like something you'd find in a festive basket dropped off by a thoughtful neighbor. Perfect for Christmas gift giving or to have on hand for guests throughout the holiday.

Read more

Chocolate Christmas Cheesecake

Chef Linda Roderick has been by my side through these cookbooks for over two decades, and there’s no one I’d rather have guiding me through a cheesecake recipe. She’s a master of the craft—steady, exacting, and always aiming for perfection. This rich, decadent chocolate cheesecake is no exception. It's all about balance. The deep, smooth chocolate filling meets a crisp, slightly salty crust for a perfect bite every time. Ensure your cream cheese is at room temperature before mixing—otherwise, you’ll end up with lumps. And when you melt the chocolate, give it time to cool slightly before mixing it into the batter, so you don’t end up with curdled filling. It’s worth the patience, every time. A few techniques can elevate this recipe to another level: chilling the dough overnight for a richer flavor, using a water bath to ensure an ultra-smooth texture, and letting the cheesecake rest for at least 24 hours before serving for the best flavor.

Read more